Attaching or Moving the Hoop Support Arms
Depending on the hoop you plan on using, the hoop support arms on the machine will need to be in the inner position, outer position, or removed completely if using a clamp or the wide angle driver.
This section will walk you through attaching and removing the support arms properly as well as adjusting the spring clips.
Video Demonstration:
Attaching the Hoop Support Arms
Determine which support arm position the chosen hoop requires. Most of the smaller hoops require the inner position. Most of the larger hoops require the outer position.
- 1. Align the hoop arms to either the inner holes or the outer holes on the x-carriage. There will be two holes for each support arm.
- 2. Make sure the clips on the ends where the tubular frame will attach are facing up. The sides of the hoop arms should face outward. This will ensure the brackets are attached to the correct side of the carriage. Also make sure both clips are attached securely to the arms.
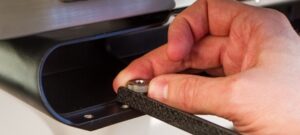
- 3. Insert two thumbscrews for each arm. Screw them in to almost finger tight.
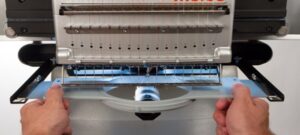
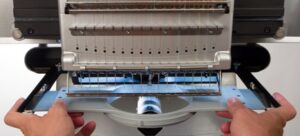
- 4. Install a hoop by sliding the side brackets of the hoop underneath the spring clips on the support arms. Slide the hoop towards the rear of the machine until it snaps into place and the brackets are fully seated beneath the spring clips. Make sure that the slotted bracket is to the right as you are facing the machine. The support arms will still move a little.
- 5. Using the installed hoop as a guide, square up the support arms.
- 6. Tighten the thumb screws to finger tight.
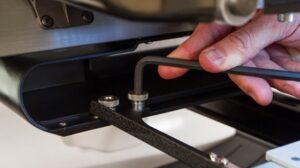
- 7. Using a 6mm hex wrench, tighten the screws a quarter to half turn more. Do not overtighten as the screws are designed to snap before damage to the x-carriage can occur.
Removing the Hoop Support Arms
- 1. Use a 6mm hex wrench to loosen each of the two thumb screws attaching each arm to the x-carriage.
- 2. Using your fingers, fully loosen the thumb screws.
- 3. Remove the support arms from the x-carriage.
Adjusting the Spring Clips
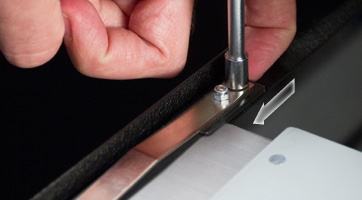
When you have a hoop installed, you should make sure both spring clips are attached securely to the arms. If either side of the hoop can move front to back underneath the clip, the clip needs to be adjusted. It may be necessary to move the hoop forward for easier access to the nuts holding the clips.
To adjust the clip:
- 1. Use a 5mm Hex nut driver to loosen the two nuts holding the clip in place.
- 2. Push the block underneath the clip as far forward as it will go.
- 3. Hold the block in place while tightening the nuts.
