Assembling the Cart
Cart Assembly
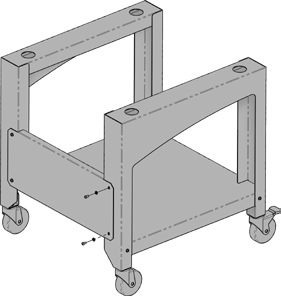
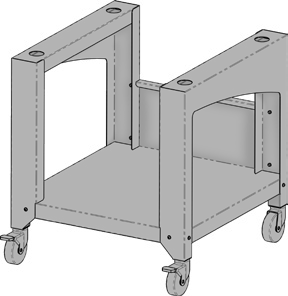
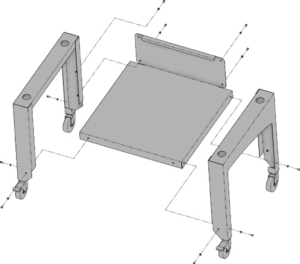
The cart consists of the items assembled as shown in the figure to the right. This assembly requires a 4mm hex wrench like the one included in the operator’s kit.
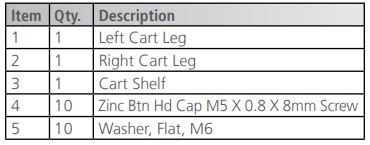
It will most likely be easiest to assemble the cart on the floor. If you are concerned with marking up the cart, first place down a large piece of cardboard or a blanket.
Video Demonstration:
Steps
- 1. Place Right Cart Leg flat with the outside surface of the leg facing down. The outside surface is the side with the curve cut into the face.
- 2. Position the Cart Shelf with the back support on the leg without the locking caster. The shelf should slide into the lower cutout section of the side supports of the legs.
- 3. Loosely assemble a screw and washer into the front section of the leg and shelf. They will be fully tightened during a step.
- 4. On the back, loosely assemble two screws and two washers into the back support of the cart and the back of the leg. They will be fully tightened during a step.
- 5. Position the cart so the back surface is down.
- 6. On the outside surface of the legs, loosely assemble two screws and two washers into the leg and shelf. They will be fully tightened during a step.
- 7. Position the left leg so the cart shelf is inside the lower cutouts of the legs. Make sure the locking caster is on the leg portion facing up.
- 8. Loosely assemble the three sets of screws and washers into the leg and cart as shown. They will be fully tightened during a step.
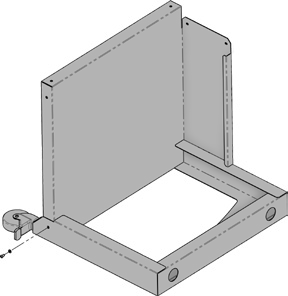
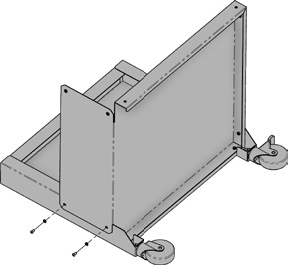
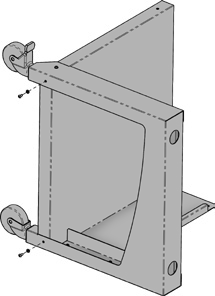
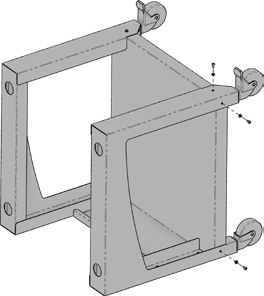
- 9. Position the cart on the casters as shown.
- 10. On the back, loosely assemble two screws and two washers into the back support of the cart and the back of the leg. They will be fully tightened during a step.
- 11. Tighten all screws.
- 12. Cart Assembly is complete!
