Selecting a Hoop
How to select a Hoop in Melco OS
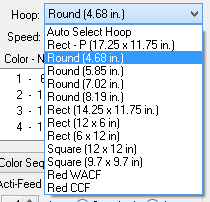
- 1. Click on the Hoop Selection drop-down to show the available hoop sizes.
- 2. Click on the hoop you want to select. The new hoop will appear in the View Window.
Video Demonstration:
- 3. If using the load design wizard, you will need to click Next > to continue to the next screen with Machine Speed and Acti-feed.
Choosing the Appropriate Hoop Size
The Melco OS view window will show how the current design will fit into the selected hoop. Ideally, the hoop used to embroider a design fits as closely as possible without the design exceeding the hoop limits. This will help prevent excess material from pulling and moving in the hoop while being sewn.
If the load design wizard is used, the hoop selection can be changed after exiting the wizard in order to see the change in hoop size on screen.
NOTE: For your first sew out, the 12cm (4.68 in.) hoop or the 15cm (5.85 in.) round hoop should work well for the 1day.ofm design.
Customize Hoop List
The hoop list drop-down can be customized to contain only the hoops that you own. To access this feature:
- 1. Click on the Tools menu.
- 2. Select Hoop Setup.
- 3. Click on the Customize Hoop List button. This will bring up a window from which you can choose which hoops will be in the hoop selection drop-down in the machine views.
- 4. Place check marks by any hoops you own or wish to be in the list, and uncheck any hoops that you do not.
- 5. When finished, click OK.
Inches or Centimeters
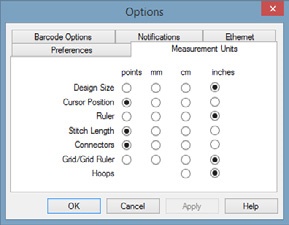
The measurement units for the hoops and many other aspects of Melco OS can be changed.
- 1. Click on the Tools menu.
- 2. Select Options.
- 3. Click on the Measurement Units Tab.
- 4. Select your desired measurement units.
- 5. Click OK.
Hoop Limits
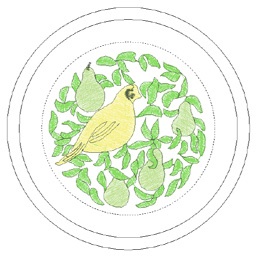
The dotted line represents the maximum sewing field, the outer solid line represents the outer edge of the inner hoop, and the inner solid line represents the inner edge of the inner hoop. Software hoop limits are drawn as a black dotted line drawn within the hoop. Software hoop limits for the sequin device are drawn as a black dash-dot-dot line within the hoop when a sequin design is loaded to the machine. Machine hoop limits are drawn as a light gray dash-dot line in hoops where machine hoop limits differ from the software hoop limits.
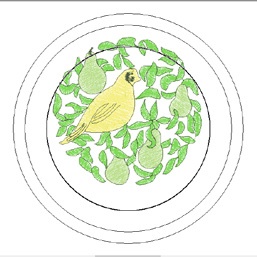
If the hoop you have selected is too small for your design, you will be able to see this in the Melco OS window. If the design crosses the dotted line, the dotted line will become a thicker solid black line indicating that the design falls outside of the recommended sewing area. This could mean that the design is too large for the hoop or simply needs to be moved to an area in the hoop that can accommodate it. If the hoop limit is exceeded and a trace command is attempted or the start button is pressed, a message window will pop up stating that “Machine ###### – Machine unable to start, hoop limits exceeded.”
Note: If the design is being viewed in 3D, the hoop limits will not change to solid black when they have been exceeded. They will still prevent the machine from sewing or tracing if they have been exceeded.
If the sequin hoop limit is exceeded when a sequin design is loaded a banner will display informing the user of potential for collision.
Centering the Hoop
If the hoop is not centered on the machine, it may be centered using either:
The Center Hoop icon in Melco OS
The Hoop and Center keys on the machine keypad.

