Five Big Mistakes to Avoid in Heat Transfer Production
From time to time things go wrong in heat transfer production. It may be caused by a lack of training for your team, a new media or garment, or just that you are busy, but mistakes cost time and time is money. At Amaya, we hold weekly technical meetings and gather the most common problems our customers are facing and how we can offer support. Here are the most common 5 and how to avoid them.
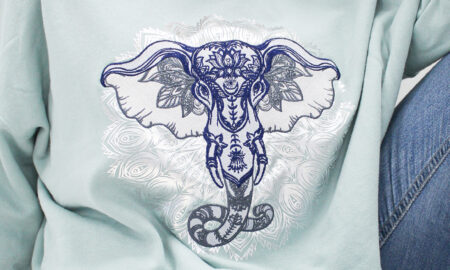
One Heat Transfer Media for all Fabrics.
Big mistake!! It may be a habit and easier to just order one type of media and assume that it will stay on the garment, but you are far better at investigating what is available and working with a range of media’s. This applies whether transfer papers or cuttable media.
I recommend a minimum of 3 products – one for cotton, one for poly/cotton or 100% polyester and one for nylon. All 3 will have different application times and temperatures which are geared towards the fabric you are printing onto. This has become more important over the years as more technical fabrics are produced. If you are not sure what you need talk to your supplier and ask for advice and free samples to test, so you can standardise the best range of media for your business.
Blade Height.
This is a controversial point – some people have no problems, stay in one setting, and cut away happily, others face constant problems. It is too simplified to work to “to cut deeper I have more of the blade out of the holder, and to cut thinner media I reduce it “. Over time this will result in changing blades more often, damaging your cutting strip and give you cutting problems on corners of designs.
I recommend having about a credit card thickness of blade visible outside the blade holder, then use the settings in the cutter to alter the cutting force to control how deep you cut, a higher cutting force for thicker media’s. By doing this your blades will last longer, you won’t need to change cutting strips, and your production will run better and faster. Tip – you need to change your cutting strip if you can feel any grooves or indents in it when you run your fingers across it.
Heat Press Times and Temperatures
It’s not one size fits all here either like with the media types above. I’ve heard many times
“We only have one heat press and are too busy to keep changing the temperature. We pick a temperature that is the middle of all media’s we use and just adjust the time accordingly”.
This approach won’t work if you want to offer a quality product to your customer that will wash and wear over time and grow the reputation of your business. Media’s have different times and temperatures for a reason and often the finishing process at the end is the most important to achieve washability and this gets ignored when people are too busy.
My suggestion here is to plan your production each day, starting with pressing the coolest temperature media first and then taking the temperature up as you change jobs. Sounds idealistic but it can be made to work. Another suggestion is to have two heat presses, which I appreciate is an extra cost but then they can both be on different temperatures all day and you can switch between the two. It also means that you are not standing on one leg if one has a fault.
Dye Migration.
This is when the colour of the fabric (usually polyester) comes through your print colour, normally seen when using light coloured vinyl or transfer. Dye migration usually occurs at 150 degrees°C upwards but beware it doesn’t always happen immediately. I’ve seen shirts printed on a Monday looking perfect and when they have arrived at the customers on the Wednesday the migration has occurred.
To fix the problem you should use media’s that require lower temperature and ideally less time – some vinyl now can be applied at 130 degrees°C. Also, most suppliers offer a “subli-block“ product in both cuttable vinyl and print & cut vinyl which has a barrier to stop the migration showing through.
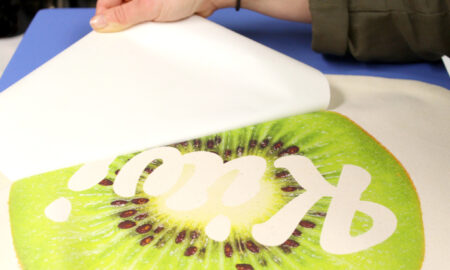
Placement.
People new to this business always ask me “how do you know where to put it on the shirt “. Anyone who has been at it as long as I have will agree, YOU JUST DO! But having guidelines for your operators and using some of the tools available will help your production enormously. Set up rules for placement on polo shirts, hoodies, work shirts, crests, shoulder blades etc – for example, the bottom of the crest lines up with the bottom button on a polo shirt. Create visual illustrations of this and have them on the wall behind your heat presses. By doing this your orders will be consistent, and your production will run faster.
Try accessories like heat tape to hold your transfers on the garment and keep them straight, or pillows inside the garment.
So that is Amaya’s idea of the top 5 problems we all face. One additional thought, heat pressing is one of the most important roles of production. Don’t leave it to a junior, give it your time and attention in setting the rules. I hope by trying my suggestions you improve your efficiency, product quality and grow your business on reputation.