How to Select a Tank
How to select a tank for the Pretreater Pro
An easy step-by-step guide on how to switch between tanks on the Pretreater Pro machine.
The Pretreater Pro machine is equipped with four tanks. Two are destined for pretreatment liquids (L1 and L2), one for the cleaner solution (CL) and the last one is the waste tank (MT).
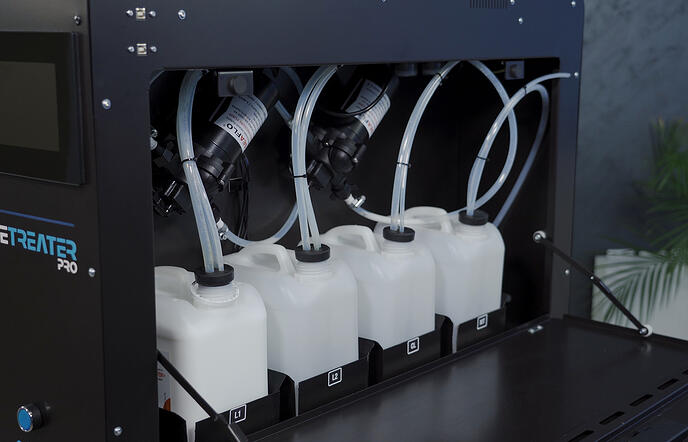
The two-tank option for pretreatment liquids offers you the possibility to fill each tank with a different kind of solution. For example, in the first slot you can install a tank that contains a pretreatment liquid-like P5001, which is intended for dark coloured garment applications and the second tank can be filled with the Polycoating solution, which is used in light coloured fabrics.
Tip: Another alternative, if you aim for a large production, is to install in both slots tanks that contain the same pretreatment solution. This way, you double the capacity of the selected liquid and you avoid the chance to run out of it quickly, while in the middle of your printing production.
Switching between tanks, either because you want to select a different pretreatment liquid or you want to initiate the maintenance procedure by loading the cleaner solution. This, can be achieved with both ways:
Via Menu button
- Step 1: At the Home screen, in your top right, tap on the Menu button.
- Step 2: Select the Tanks icon.
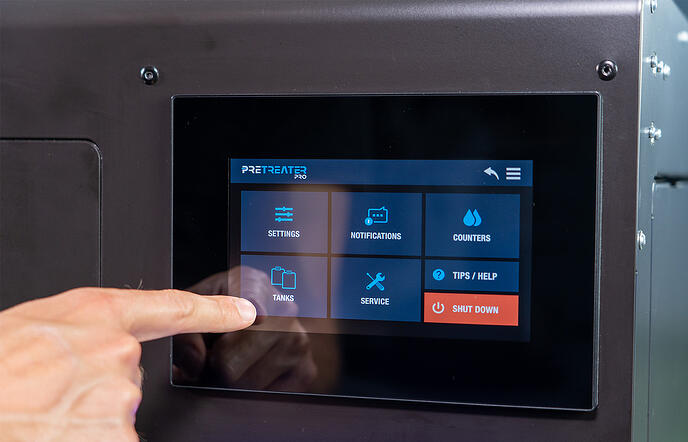
- Step 3: Choose the tank of your choice.
- Step 4: Confirm to start the process and Yes to proceed.
Via Tanks icons
- Step 1: At the Home screen, in your bottom right, long-press the Tanks Icons.
- Step 2: Choose the one you want to use.
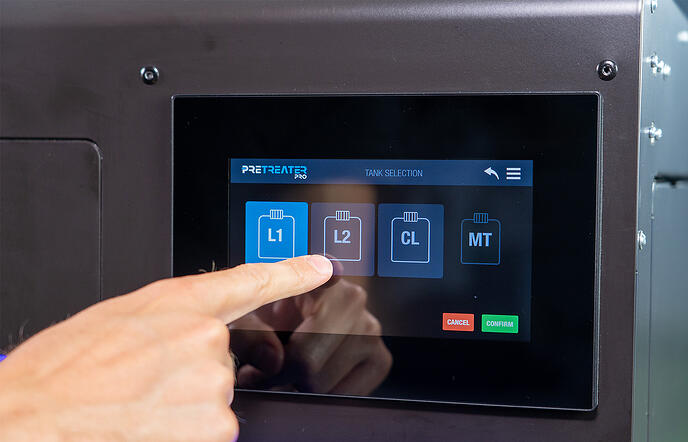
- Step 3: Confirm to start the process and Yes to procced.
